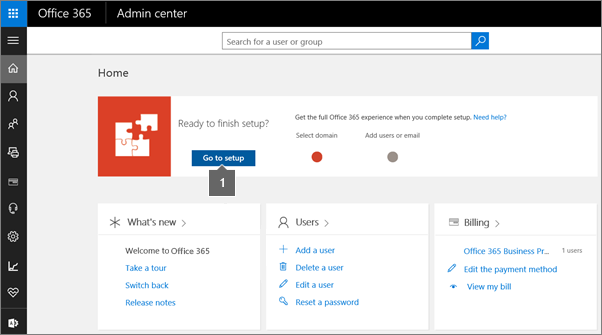
Setup the DNS settings required to use your domain in Office 365.
Find the TXT record value and verify
- Sign in to Office 365 with your account.
- Go to Admin Center > Settings or Setup > Domains.
- Click your domain, then choose Start setup. Alternatively, choose "Add domain" and enter the desired domain to add. You'll go back to the domains setup wizard to see the specific value you need to add.
On the Verify Domain page, you'll find step-by-step instructions to add a record to verify your domain.
Copy the MS=msXXXXXXXX value shown.
Follow the steps needed to create the TXT record (or MX record) at your DNS host, then verify the domain back in Office 365.

Find the MX record value for email and more
Please note that by doing these changes, you are effectively routing all of your e-mail traffic for this domain to your Office 365 account.
Sign in to Office 365 with your work or school account.
Go to Admin Center > Settings or Setup > Domai
- On the Domains page, select your domain.
Under Required DNS settings, you'll see the DNS records to add.
- You'll want to keep this information available while you make changes at your DNS host, so you can copy and paste the values.
- The groups of DNS records that are listed on the page depend on your choices listed under Domain purpose.
Follow the steps to create the records at your DNS host.
Tips:
- DNS settings can take anywhere from 1 to 24 hours to replicate, depending on your domain host. If you have made the changes on your DNS settings, but Office 365 is still not reflecting the changes, try again after some time.
- It's not needed to do the whole process in one sitting. You can save and close your work on the Office 365 domains wizard, and continue when you're ready to proceed. Remember that any changes done on your DNS host will not be reverted upon exiting this wizard.
Related Articles
Set up Office 365 for business - Office 365
The basic Office 365 setup process, end-to-end The Office 365 setup wizard will guide you through the first step to add other people to your subscription and set up your domain. Then we show you what else you can do to get the most out of Office ...Office 365 Videos
End user training resources for Office 365 - Partner Technical Services Blog - Site Home - TechNet Blogs The following Office 365 videos are available: Video: Welcome to Office 365 Video: Share Documents in Office 365 Video: Use email and more in ...How to download, install and activate Office apps with Office 365
To download Office: Go to m365.cloud.microsoft/apps and if you're not already signed in, select Sign in. Sign in with the account you associated with this version of Microsoft 365. From the home page select Install apps. (Or, you might need to select ...Office 365 Training Resources
End user training resources for Office 365 - Partner Technical Services Blog - Site Home - TechNet Blogs If your organization signed up for Office 365 and you need to start reading email, sharing documents, and more, see the following resources to ...Admin roles in Office 365
Assign admin roles in Office 365 for business. As the person who purchased your Office 365 business subscription, you are the global administrator. This means you have complete control over the Office 365 suite of products. To help you manage Office ...