Install Skype for Business on Windows
Skype for Business is part of the Office 365 suite of products.
You get the Skype for Business download from the Office 365 portal, and then install it on your computer. These steps usually take 10-15 minutes to do.
These instructions explain how to get to the Skype for Business download, and install it.
Tip: If you don't see the Skype for Business download in your portal, make sure the Office 365 for business plan you purchased includes it. Also, ask the person in your business who purchased it whether they assigned a license to you.
Sign in to Office 365 at https://portal.office.com/.
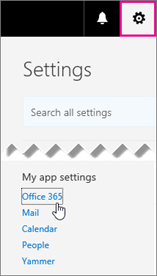
At the top of your Office 365 page, choose
 > Office 365.
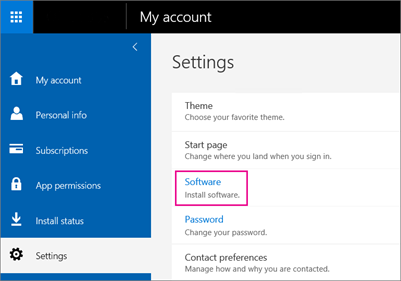
Choose Software.
Depending on your Office 365 plan:
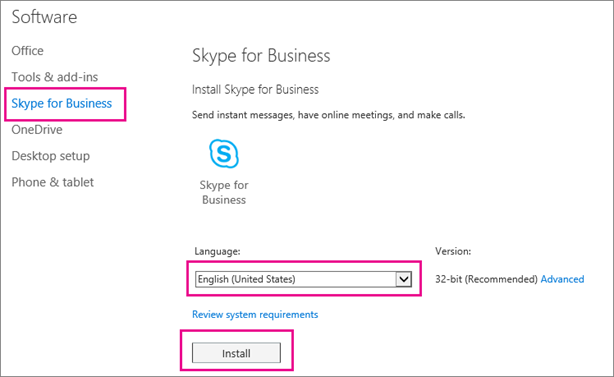
If you see the following page, choose Skype for Business, choose your language, the edition that matches your other Office applications (32 bit or 64 bit - if you don't know, choose the default) and choose Install. Then go to step 5.
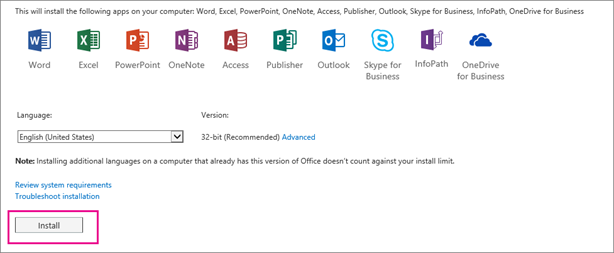
If Skype for Business is bundled with other Office 365 applications, you'll see the following page. Choose Install to install the Office 365 suite of applications, including Skype for Business. When you're done, go to Sign in for the first time at the end of these steps.
If you don't see Skype for Business listed at all, then it's not included in your Office 365 business plan -OR- your admin hasn't assigned a license to you. Ask your admin (the person who gave you sign-in information) for help.
At the bottom of your screen, choose Save as to download the setupskypeforbusinessentryretail.exe file to your computer.

Important: Note where you saved the setupskypeforbusinessentryretail.exe file on your computer. If Skype for Business stops during setup, this is where you go to re-run it.
After the setupskypeforbusinessentryretail.exe file has downloaded, choose Run.

The Office installer starts, and displays a message that it's installing Office. However, it's only installing Skype for Business. It is not installing all of Office.
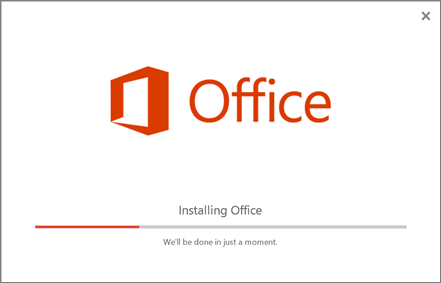
When the Office installer is finished, it displays a message that Office was installed on your computer. However, only Skype for Business was installed. Choose Close.
Launch Skype for Business. At the First things first box, if you accept the licensing agreement, choose Accept.
- You can install Skype for Business on up to 5 PCs.
Congratulations! You're done installing Skype for Business. Now you're ready to sign in to Skype for Business for the first time.
Related Articles
How to download, install and activate Office apps with Office 365
To install Office: Go to https://portal.office.com/ and select Sign in. Sign-in with your Office 365 credentials. In the upper right corner, click on Install Office. Choose "Other installs" to look for downloads different than Office, such as Visio, ...Self-service migration of email and contacts to Office 365 for business
This is part of a Microsoft self-service article titled Set up Office 365 for business. One mailbox: How to import email, contacts, and calendars to Office 365 Here are the different methods you can use to copy email, contacts, and calendars to ...Convert a user mailbox to a shared mailbox
This article explains how to use the Exchange admin center to convert an Office 365 user mailbox to a shared mailbox. You can also convert one mailbox type to another, but you'll have to perform these tasks using Exchange PowerShell. Convert an ...Calling| Advanced
Manage your call settings in Teams To change call settings, click your profile picture at the top of Teams, then click Settings. In the General section, you can select either Microsoft Teams or Skype for Business as your default calling app. In the ...Office 365 Training Resources
End user training resources for Office 365 - Partner Technical Services Blog - Site Home - TechNet Blogs If your organization signed up for Office 365 and you need to start reading email, sharing documents, and more, see the following resources to ...